|
<< Prev
[1]
[2]
Next >>
 |
Step 6
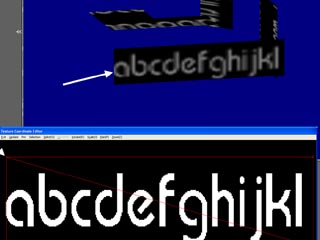
After re-alignment the map rectangle surrounds the upper row of characters. This is applied to the indicated rectangle with the result pointed to in the 3D window.
|
 |
Step 7
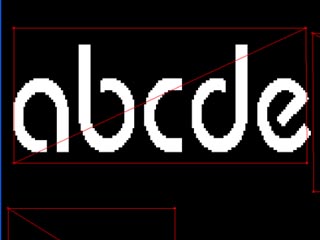
When we select all the vertices and reposition the image map coordinates the result will be like this. To finish we use the "Exit" command.
Exit - Return to the OpenFX design module
We can change the pen colour in which the mesh and vertices are drawn using the menu command.
Pen - This submenu offers a selection of colours in which to draw the map mesh. Choose the one that offers the best contrast with the background image.
To look at a part of the image/mesh in greater detail the Pand and Zoom tools can be used.
Pan (keyboard key P)
When the window is showing an enlarged image (i.e. when zoomed in) this tool will move the image so that those parts of it, that lie outside the visible window, will be moved into view.
Zoom (keyboard key Z)
Use this tool to enlarge part of the image, for fine mesh adjustment.
Download resource files here. When available.
|
Tutorial written by Stuart
<< Prev
[1]
[2]
Next >>
|