|
<< Prev
[1]
[2]
Next >>
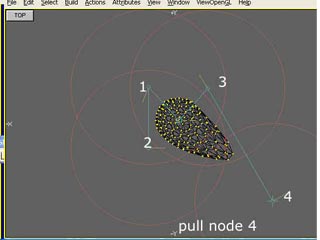 |
Step 6
In this example we see the effect of distorting a sphere when all vertices (bone nodes) lie
within the range of all the bones, move vertex 4.
|
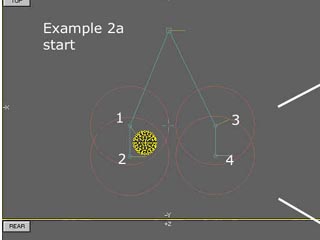 |
Step 7
This example is a variation of the previous example,
where the bone joining nodes 3 and 4 lies too far away from the vertices in the sphere
to influence it.
|
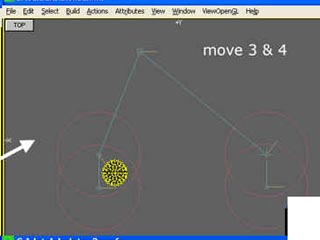 |
Step 7
The result of moving vertices 1&2 and 3&4 together is illustrated. (Moving 3&4 has no effect)
|
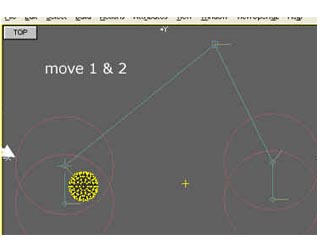 |
Step 9
Moving 1&2 causes an 'on-block' move of the the vertices because all those bones
influencing the vertices move by the same amount at the same time.
Download resource files here.
|
Tutorial written by Stuart
<< Prev
[1]
[2]
Next >>
|