|
<< Prev
[1]
[2]
Next >>
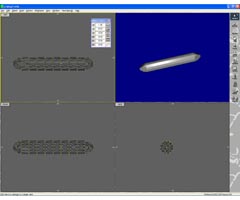 |
Step 6
If we now re-load the original two vertex model and repeat the Shrink map example, but
this time with the "Round Edges" option selected we will get a cylinder with rounded off edges.
This is because we are considering the field emminating from the edge and is it does
not "fall off" from just the vertices.
|
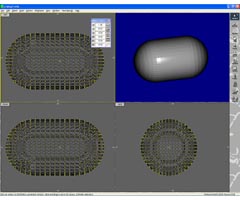 |
Step 7
Again, changing the surface distance to 0.7 (leaving the max set to 1.0) will produce a surface
that is further away from the edge used by the tool.
|
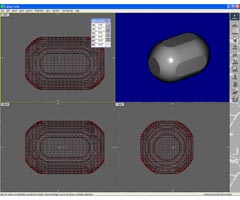 |
Step 8
It takes a little experiment to get a good feel for the adjustment of the parameters of the Shrink Wrap function.
It should not be necessary to change the default Sample Resolution. Begin by trying to get the form of
the shape that you want by choosing values for Sampling distance and the Maximum Sampling Distance. Remember, that the significance
of these depends on the unit distances. I suggest that you start by assigning the "Sampling Distance",
use the "Units" floating dialog to visually decide how far away from the shape you want the surface to
lie. Then choose the "Maximum Sampling Distance" so that it about 2 to 3 times as far away. (This
allows for the surface to have a fairly smooth appearance and to maximise the use of the Sample Resolution.
(The UNDO function is a useful way to experiment.) When you have a good shape you can always repeat
the step with a larger Sample Resolution.
If you make the Maximum Sampling distance too large or you make the Surface Distance too large then
the mesh will come up against the internal boundary that surrounds all the selected vertices, giving a
result like this.
|
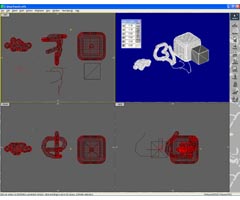 |
Step 9
The Shink Wrap action can also wrap around polygons, for example if you shinkwrap around a cube
a nice "dice' type object can be created. The image for this step illustrate the effect of
shrink wrappping around a point cloud, a 3D curve and a cube. Lots of interesting shapes can
be built using this tool alone. It can even be used to build a more regular mesh around some
shapes that have a poor mesh.
Download resource files here.
|
Tutorial written by Stuart
<< Prev
[1]
[2]
Next >>
|